ReCiPeS

sorry we dont have alot right now ):

Some like it hot…

Banana Pudding

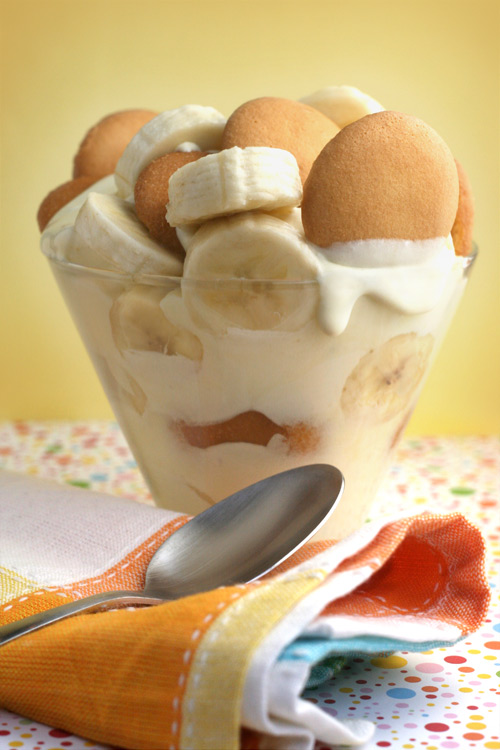
…and judging by how quickly this dessert disappeared, some like it cold, too. I'm talking about good, old-fashioned banana pudding, of course. Me? I like it cold… okay, and hot, too! My grandmother used to make a homemade one that was served warm and oh, how I wish I had the recipe for it. But, since I don't and it's summer, this cold and creamy one will do just fine. It's really easy to make and let me tell you, pretty darn good. Here you go:

Cold & Creamy Banana Pudding

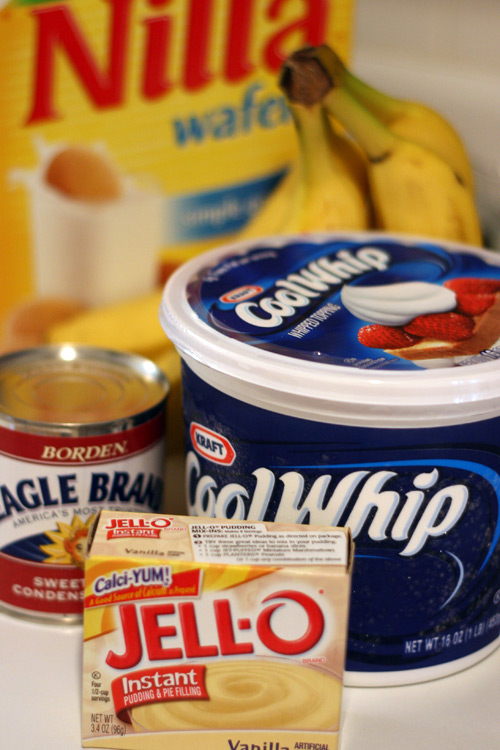
1 (14-ounce) can Eagle Brand Sweetened Condensed Milk
1 1/2 cups cold water
1 (3.5 ounce) package instant pudding and pie filling
2 cups (1 pint) whipped cream, whipped*
36 vanilla wafers
3 medium bananas, sliced and dipped in lemon juice

  • In a large mixing bowl, combine sweetened condensed milk and water.
  • Add pudding mix and beat until well blended.
  • Chill 5 minutes in refrigerator.
  • Fold in whipped topping. (Do this slowly and as few times as you possible to combine, so the mixture will retain its thickness.)
  • Spoon 1 cup pudding mixture into 2 1/2 quart glass serving bowl.
  • Top with 1/3 each of wafers, bananas and pudding. Repeat twice.
  • Garnish as desired.
  • Chill thoroughly. Refrigerate any leftovers.
You can also layer in individual serving dishes.

* I'm not quite clear what "whipped cream, whipped" means, but I just used Cool Whip and let it thaw slightly before I started to fold. It may work even better if you let it thaw in the fridge before using.

Update - I've learned it may also be heavy whipping cream that is whipped. If you can find Borden whipping cream, which I can't, then that's it. Either way, It will be good!

Recipe from Great American Favorite Brand Name Cookbook, 1993.
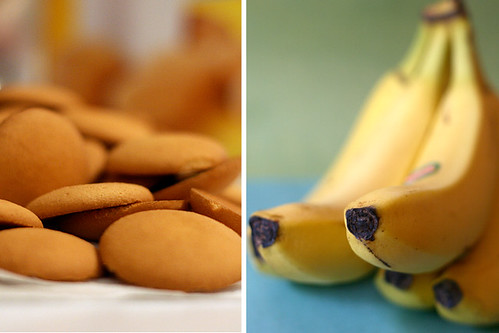
Bananas & Wafers
Easy Ingredients

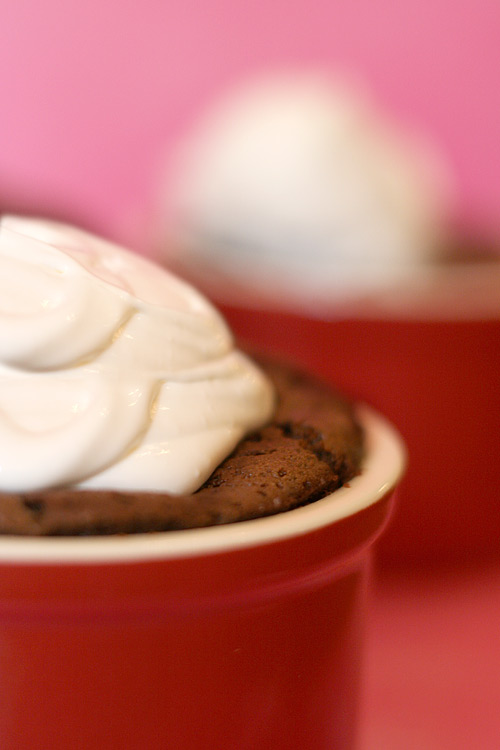
 Souffle the easy way
 1/2 cup (1 stick) butter
1 1/4 cups sugar
1 teaspoon vanilla extract
4 eggs
2/3 cup milk
1/2 teaspoon powdered instant coffee
2/3 cup all-purpose flour
2/3 cup cocoa
1 1/2 teaspoons baking powder
1 cup (1/2 pint) whipping cream
2 tablespoons powdered sugar

  1. Preheat oven to 325 degrees.
  2. Grease and sugar eight 6-ounce ramekins.
  3. In large mixer bowl, beat butter, sugar and vanilla until light and fluffy.
  4. Add eggs, one at a time, beating well after each addition.
  5. Scald milk. Remove from heat and add powdered coffee, stirring until dissolved.
  6. Stir together flour, cocoa and baking powder. Add alternately with milk mixture to butter mixture. Beat 1 minute on medium.
  7. Divide batter evenly among ramekins.
  8. Place ramekins in 2 8-inch square pans. Pour hot water in bottom of pans to 1/8 inch deep and place pans in oven. Bake for 45-50 minutes or until toothpick inserted comes out clean.
  9. Remove pans from oven and let ramekins stand in water for 5 minutes.
  10. Remove ramekins from water and let cool slightly.
  11. You can serve in dish or invert onto dessert plates.
  12. For topping: beat whipping cream and powdered sugar in small mixing bowl until stiff and spoon onto warm soufflés.
Recipe from Great American Favorite Brand Name Cookbook, 1993.
Need some ramekins?

Now, after doing some research, I realized that the above recipe is not what you would consider a traditional soufflé. One that uses egg whites to obtain that desired height above the ramekin.
 

Can you draw as good as a six-year-old?

Sure you can - and impress your kids at the same time.

Butterflies in Buttercream

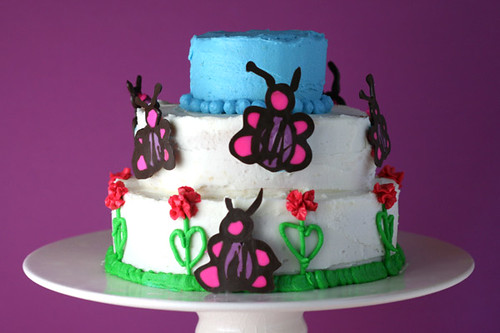
This was my first attempt at a multi-tiered cake. And of course, I went mini. I used a 6" inch pan, a 5" pan and a ramekin dish for the top. The cake was made from this recipe. It was ok, but I'm still on the hunt for the perfect, easy, moist, delicious, no-fail, homemade, yellow cake recipe. (That's not too much to ask for, is it?)

So, now that I had cake, I needed to decorate. (Here's where your kids come in.) I used some more of my niece's artwork as inspiration.

Inspiration

I used the same candy technique I showed you recently and it worked beautifully for her butterflies. But instead of using the candy melts and squeeze bottles, I used candy writers. Yep, I said candy writers. First an edible ink pen and now squeezable colored chocolate. These were perfect because I just needed a little of each color and didn't really want to go to the trouble of melting bowls of chocolate. They're really easy to use and no mess to clean up. You just rest them in a bowl of hot water and use your hands to knead until ready. For the rest of the cake, I just colored buttercream frosting to match the colors in her drawing.

Candy Writers

When my niece came over, she recognized her drawing right away and was so excited to see her art in icing. Yay, success! So get those pics off the fridge and make an edible, adorable memory.

Proud little artist

These can help you:
Candy Writers
6 inch Cake Pan
Ramekins
Multi-Tier Cake Pan Set (This would have been handy)
Wilton Icing Colors (To color your frosting)

Buttercream Frosting
1 cup (2 sticks) butter, softened
1 teaspoon pure vanilla extract
1 1b. 10X powdered sugar
1-3 teaspoons milk, half and half or cream

1. Using a mixer, cream softened butter and vanilla with a mixer until smooth.
2. Add sugar gradually, allowing butter and sugar to cream together before adding more.
3. If you want it a little creamier, add a teaspoon of milk at a time and beat on high until you get the right texture.
 Pool Party Pops

Friday, June 20, 2008

Bikini Beach Bears

haha im doing these for my birthday!!

Bikini Beach Bear Cupcakes

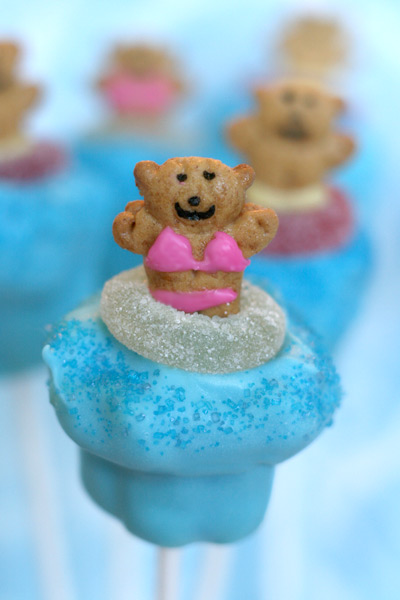
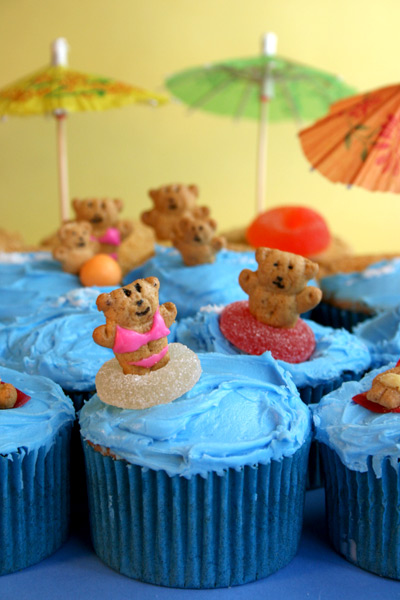
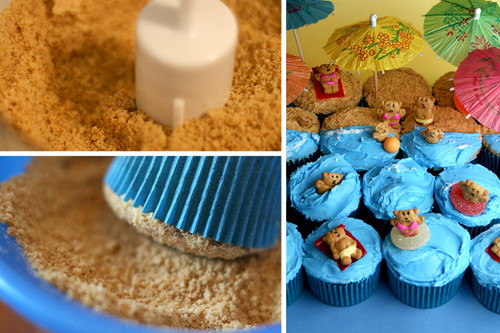
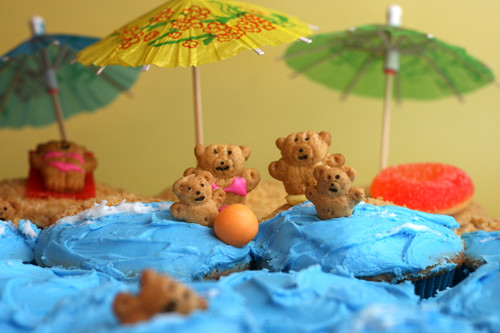
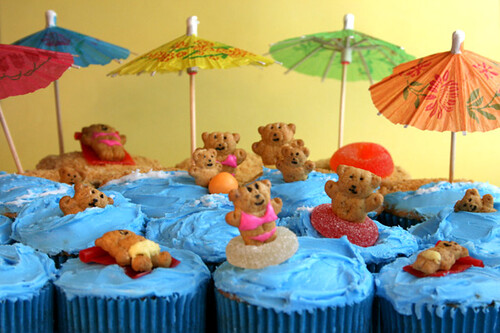
Well, today is the first day of summer and what could be better than going to the beach? A beach cupcake! That way, I don't even have to get into a bathing suit. (Not to mention, I'm not near the beach, so this will have to do.) Aren't these little bears just too cute. And they're pretty tasty, too. Here's what I used:
  • Cupcakes and frosting (tinted blue)
  • Blue baking cups
  • Cocktail umbrellas
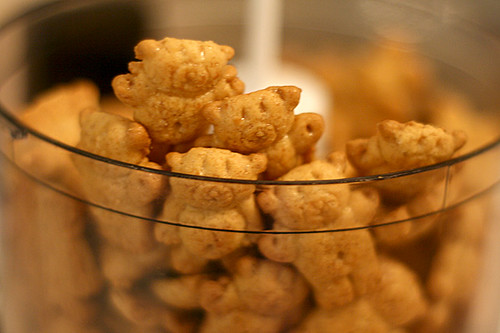
  • Bears - Honey Teddy Grahams and I just used a candy writer to draw their tiny little bathing suits on with a toothpick. For the faces, I used an edible ink pen. (I keep finding new uses for this thing. I love it.)
  • Inner tubes - Lifesavers Gummies
  • Towels and floats - Fruit Roll Ups
  • Beach Balls - small gumballs
  • Beach sand - Okay, this is difficult to look at. For the weak at heart, close your eyes. I'm sorry to say I had to sacrifice a few little teddy bears. They tried their best to escape…
"Please save us!"
A sweet sacrificeBikini Beach Bear Cupcakes

Check back tomorrow for part two of this sweet summer kickoff!

Thanks to the book, Hello, Cupcake! for inspiring me to use common candies in uncommon ways.

Bikini Beach Bear Cupcakes

Bikini Beach Bear Cupcakes
 heres the link websit we got these from http://bakerella.blogspot.com/
 

Ingredients

Directions

  1. 1
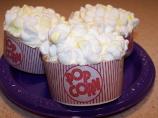
    Frost the cupcake with white icing. To create each piece of "popcorn," cut one mini marshmallow in half and squish the two pieces back together into a whole mini marshmallow, pinching firmly. Pile the finished popcorn onto the frosted cupcake.
  2. 2
    For a buttery look, either dilute a drop of yellow food coloring in water and brush it on with a clean paintbrush or mix pastel yellow marshmallows in with the white.
  3. 3
    To make the band, cut a strip of construction paper about 1 1/4 inches by 8 inches, or to fit your cupcake, and decorate as shown.
  4. 4
    If you're creating many cupcakes, design just one band and color photocopy it. Wrap the band around the cupcake and secure with tape.


Pool Party Cake


Make this cake and we guarantee your guests won't hesitate to plunge right in.

Find More:
Birthday Cakes
Holiday & Seasonal Cakes
Birthday Cupcakes

RECIPE INGREDIENTS:
1/2 gallon quality ice cream (any flavor)
1 1/3 8.5-oz. pkgs. fudge sticks (chocolate or peanut butter)
2 cups heavy cream
1/4 cup sugar
1/2 tsp. vanilla extract
Blue food coloring
Gummy rings
Gobstoppers
Paper umbrellas
Plastic figures
Licorice
Decorators' frosting

Step 1 1. Begin by making the ice-cream base of the pool cake. Let the ice cream soften at room temperature for 15 to 20 minutes, then ask your kids to help you spoon it into an 8-inch round springform pan, souffle dish, or plastic container. Pack the ice cream into the mold and smooth out the top. Cover with plastic wrap and freeze for at least 4 hours or overnight.

Step 2 2. After the ice cream has frozen solid, unmold it by dipping the container quickly into a pan of hot water; if necessary, you can also loosen the edges of the ice cream with a knife. Invert the mold onto a large plate and carefully lift off the pan to reveal the ice-cream cake.

Step 3 3. Your kids can then carefully place the fudge sticks (we alternated plain and chocolate-peanut butter) along the sides of the ice-cream pool cake, the cookies will resemble the panels of an aboveground pool. Return the cake to the freezer while you prepare the whipped cream.

4. To make the blue whipped cream waves, pour the cold heavy cream into a bowl. Beat with an electric mixer until the cream begins to thicken and soft peaks form. Add the sugar and vanilla extract and beat until stiff. Mix in several drops of blue food coloring. Frost the top of the frozen cake with the blue whipped cream, then return it to the freezer for 15 to 30 minutes or until set.

5. Next, let your kids turn the cake into a bustling pool with gummy ring inner tubes, Gobstopper beach balls, paper umbrellas, and plastic swimmers. Add a licorice ladder with licorice rungs (use decorators' frosting to glue it together).

6. Now it's time to take the plunge into the pool cake. For best results, serve it immediately and do not let it stand at room temperature for long. Store leftovers in the freezer. Feeds 10 to 12 hungry swimmers.

7. Tips:

  • To add variety, you can layer different flavors of ice cream or mix in candies (chocolate fish, anyone?). The trick is to loosen the ice cream without melting it, so don't hold the mold in the hot water for more than a few seconds.
  • Ask your children to work quickly while they place the chocolate cookies around the outside -- otherwise, they'll have a melted "pool" of ice cream.
  • For foolproof whipped cream, chill the bowl and beaters in advance.
  • Take the kids with you to buy pool accessories at a party supply store, suggests Gail. "They have a better concept than we do about what makes good pool toys." If you can't find plastic swimmers, call Sugarcraft at 513-896-7089 or go to www.sugarcraft.com to place an order.

    we got this idea from familyfun.com
  •  

    Big Fish Cake


    Big Fish Cake
     
    Makes: 12 servings
     

    Ingredients

    • 1  box (18-1/4 ounces) yellow-cake mix
    • 1  can (16 ounces) vanilla frosting
    •   Orange food coloring
    • 1  blue sour gumdrop
    •   Twizzler Pull-N-Peel in Watermelon Mania

    Directions

    1. Prepare cake mix according to package directions for baking one 9 x 13-inch cake using pound-cake variation (add instant pudding and an extra egg). Cool completely.

    2. Using the fish template as a rough guide, cut fish shape from cake.

    3. Tint vanilla frosting orange. Frost entire cake. Place gumdrop on cake for eye. Cut Twizzler to fit cake, and place on top to divide face and body. Trim Twizzler string into strips for tail. Using the back of a spoon, pull frosting away from cake to give body of fish a scaly look.


    Pirate Cake


    Pirate Cake
     
     
    View Nutrition Facts

    Ingredients

    • 2  boxes (18.25 ounces each) cake mix
    • 2  cans (16 ounces each) milk-chocolate buttercream frosting
    • 1  can (12 ounces) whipped vanilla frosting, divided
    •   Blue, red, and yellow icing colors
    • 3  black licorice twists
    • 1  small bag of square-grid pretzels, such as Snaps
    • 1  each round cookie and pretzel rod
    • 2  chopsticks
    •   Paper for sails

    Directions

    1. Bake two 9 x 13-inch cakes according to directions. Let cakes cool completely. Place one cake on serving platter. Cut a 2-1/2-inch slice from one short end of the second cake. Cut the remaining piece of the second cake in half horizontally.

    2. Using chocolate frosting, attach small cake piece to the end of the large cake on the platter (see photo above). Using chocolate frosting, attach 2 large pieces of cake on top of each end of base cake. With a serrated knife, cut step from top layer of back end of ship to create third level of ship (see photo). With cake layers assembled, cut boat shape using our template below as a guide. Frost entire cake with chocolate buttercream. Using a small fork, gently score the entire cake with wavy lines to simulate wood.

    3. Divide vanilla frosting among 3 bowls. Tint one blue, one red, and one yellow. Place blue frosting in a piping bag fitted with a ribbon tip, and place red and yellow frostings in bags fitted with plain tips. Pipe blue trim around entire upper edge of ship, then pipe red frosting underneath the blue. Cut licorice into 20 lengths. Insert licorice pieces into sides of ship for cannons. Pipe half circles of yellow frosting over cannons. Pipe yellow windows across the stern and around the back of ship. Pipe yellow curlicue designs on bow of ship and decorate with red dots of frosting.

    4. Using a serrated knife, gently cut pretzels in half. Place pretzels around bow and stern for railings. Using chocolate frosting, pipe the captain's wheel on the round cookie. Attach wheel to pretzel rod with chocolate frosting and insert in cake near bow.

    5. To make sails, download our template at parents.com/pirateship. Print them, then cut out; use chopsticks to mount them on cake.


    Doll house cake

     
    Dollhouse Cake
     
    Makes: 20 servings
     

    Ingredients

    • 2  boxes (18.25 ounces each) yellow-cake mix
    • 3  cans (16 ounces each) vanilla frosting
    • 9  rolls candy wafers (such as Necco)
    •   Strawberry wafer cookies
    •   Red, green, and orange icing colors
    •   Pink and purple mini candies (such as Nerds)

    Directions

    1. Grease and flour two 9 x 13-inch baking pans. Using pound-cake variation on side of box (add instant pudding and 1 extra egg), prepare cake mixes according to package directions. Bake in pans. Let cakes cool completely.

    2. Tint 2 containers of frosting pink using red icing color. Cut cakes in half crosswise. On serving platter, stack 3 cake halves with thin layers of pink frosting in between. For roof: Measure 1-1/2 inches in from opposite sides of remaining cake half, and cut 2 wedges from the lines to the bottom corners of the cake layer. Flip wedges up to create peak of roof. Attach all roof pieces to top of cake with pink frosting. Frost entire cake with remaining pink frosting.

    3. Using a serrated knife, cut 3 wafer cookies to a length of 2 inches, then cut in half on the diagonal. Using pink frosting, sandwich 3 halves together for each dormer window. Press into roof. Carefully split 1 wafer in half to create 2 thin wafers. Cut in half crosswise. Using frosting, attach to tops of dormers, filling in center spaces. Press 2 wafers to front of house for door. Cut 1-3/4-inch piece of wafer for window over door; press into frosting.

    4. Starting at bottom edge of roof, place pink, orange, purple, and white candy wafers in overlapping rows to create the shingles on the roof.

    5. Spoon 1/2 cup white frosting into bag fitted with a #4 plain decorating tip. Spoon 1/2 cup white frosting into each of 2 bowls. Tint 1 green and 1 pale orange. Spoon into freezer-weight resealable plastic bags, and snip off a tiny corner. Pipe window frames, door knobs, dormer windows, and window boxes using white frosting. Pipe curtains in windows using pale orange. Pipe small dots of green for leaves in window boxes. Place pink and purple candies in leaves for flowers. Pipe white frosting on surface for sidewalk. Place brown and black wafer candies for stones. Pipe small dots of green for leaves along edge of sidewalk, then place pink and purple candies in leaves for flowers.


    Cowboy-Boot Cake


    Cowboy-Boot Cake
     

    Ingredients

    • 1  box (18.25 ounces) yellow or devil's food cake mix
    • 1  can (16 ounces) vanilla frosting
    • 1  can (16 ounces) caramel frosting
    •   Red icing color

    Directions

    1. Grease and flour a 9 x 13-inch baking pan. Using pound-cake variation on side of box (add instant pudding and 1 extra egg), prepare cake mix according to package directions. Bake in pan. Let cake cool completely.

    2. To make boot, click below to print out the boot template. Place on top of cake, angling so template fits. Using a food-coloring marker, draw outline of the boot pieces on cake, and cut out pieces with knife.

    3. Spoon 1/2 cup vanilla frosting into a freezer-weight resealable plastic bag, and snip off a small corner. Tint remaining vanilla frosting red. On serving platter, attach cake pieces together with red frosting to make shape of boot. Cover entire boot with a layer of red frosting. Freeze cake for 1 hour. Frost heel, toe, sole, and top of boot with caramel frosting. Place 1/4 cup caramel frosting in freezer-weight resealable plastic bag, and snip off small corner. Pipe line down center of boot.

    4. Click below to print out piping template. Cut out and place on the boot, tracing outline with a toothpick. Flip template and repeat on other side of boot to create mirror image. Pipe white frosting over scored outline for stitching. Pipe white lines around edges of caramel top and toe of boot.


    Little Critter Cupcakes


    Little Critter Cupcakes
     
    Makes: 24 cupcakes
    Prep: 1 hour
    Bake: 19 to 22 minutes
     

    Ingredients

    • 1  box (18.25 ounces) yellow-cake mix
    • 1  can (16 ounces) vanilla frosting
    •   Green food coloring
    •   Froot Loops
    •   Snack 'Ums Big Boomin' Pops
    •   Marshmallows
    •   Pink and yellow sugars
    •   Red and black licorice strings
    •   Brown decorating icing
    •   Candy eyes
    •   Flower sprinkles
    •   Keebler Rainbow Vanilla Wafers
    •   Reduced-fat chocolate Nilla Wafers
    •   Hershey's candy-coated milk-chocolate sprinkles

    Directions

    1. Heat oven to 350°F. Line two 12-cup muffin pans with paper liners. Prepare cake mix according to package directions, and bake 24 cupcakes. Cool completely. Tint frosting green with food coloring, and frost cupcakes.

    For Butterflies: Stand 6 Froot Loops in a row down center of cupcake for the body. Place 1 Snack 'Ums pop at end for head. Cut 2 marshmallows in half, and sprinkle cut side with pink or yellow sugars. Place on cupcake as wings. Cut 2 red licorice strings 1-1/2 inches long, and insert for antennae. Pipe 2 dots of decorating icing onto head, and attach candy eyes.

    For Ladybugs: Roll edge of frosted cupcake in flower sprinkles. For wings, cut 1 red-colored wafer in half, and attach with decorating icing to chocolate-wafer body. Place ladybug in center of cupcake. Pipe small dots of icing onto red wafer, and pipe a circle for the head. Attach candy eyes and a red candy-coated milk-chocolate sprinkle for nose. Cut 2 black-licorice strings 1-1/2 inches long, and insert for antennae.

    For Bees: Roll edge of frosted cupcake in flower sprinkles. Place an orange wafer in center of cupcake. Pipe lines of icing onto wafer. Cut a marshmallow in half, and attach for wings. Using the icing, pipe a circle for the head. Attach candy eyes and yellow candy-coated milk-chocolate sprinkle for nose. Cut a 1-inch piece of black licorice, and insert into back of bee for stinger.


    Sunshine Cake

     
    Sunshine Cake
     
    Makes: 9 servings
    Prep: 25 minutes
    Freeze: 4 hours
     

    Ingredients

    • 1  quart orange sherbet or sorbet
    • 1  frozen pound cake (12 ounces), thawed
    • 9  sugar ice-cream cones
    • 1  cup vanilla frosting
    • 1/2  cup orange decorating sugar
    • 2  Chocolate candies, 1-inch round
    •   Chocolate decorating frosting
    •   Orange decorating gel
    •   Ground graham-cracker crumbs (optional)

    Directions

    1. Coat 1-quart bowl with cooking spray, and line with plastic wrap. Spoon sherbet into bowl and press down. Smooth top.

    2. Cut pound cake in half horizontally. Place slices on top of sherbet; trim to fit. Cover with plastic wrap, and freeze until firm, about 4 hours.

    3. Measure cones to 3-1/2 inches in length from tip. Trim off excess with serrated knife. Spread an even layer of frosting on each cone. Place colored sugar on plate, and roll cones in sugar to coat.

    4. Remove top layer of plastic wrap, and invert cake onto plate. Remove remaining plastic wrap. Press cones into edge of cake to form rays. Trim chocolate candies to resemble sunglasses, and place on sherbet. Using chocolate frosting, pipe frame of sunglasses. Pipe a smile onto sherbet with orange decorating gel. Scatter graham-cracker crumbs for sand, if desired.

    5. To serve, scoop sherbet into cones wrapped in paper napkins.


    Poodle Cupcakes


    Poodle Cupcakes
     
    Makes: 16 cupcakes
     

    Ingredients

    • 1  box (18.25 ounces) cake mix
    • 2  cans (12 ounces each) whipped vanilla frosting
    •   Pink icing color
    • 24  pink marshmallow peanuts
    •   Mini pink marshmallows
    • 1  tube brown decorating icing
    •   Red Hot candies

    Directions

    1. Prepare cake mix according to directions for 16 standard cupcakes and 16 mini cupcakes, using paper liners. Bake mini cupcakes 15 to 20 minutes and standard cupcakes for 25 to 28 minutes. Let cool completely.

    2. Combine cans of frosting and tint pink. Frost all cupcakes. Cut 16 of the marshmallow peanuts in half lengthwise. Cut remaining 8 marshmallow peanuts in half crosswise, and shape into cones for noses. Place one cone shape close to edge of each mini cupcake. Arrange lengthwise marshmallow halves on either side of the mini cupcakes for ears. Cut mini marshmallows in half and arrange around peanut marshmallows. Pipe two eyes, using tubed icing; attach Red Hot at tip of each nose, using pink frosting. Place mini cupcakes on their sides on top of larger cupcakes. Fill in puppy bodies with cut mini marshmallows.


    Make a Free Website with Yola.